Backyard DIY Fire Pit Done in a Weekend
A step-by-step tutorial for how to build a DIY backyard firepit + the best equipment for making the job faster and easier.
Merry Christmas to us! Maybe some couples wrap jewelry and a new winter coat to put under the tree to give each other but gifted ourselves a backyard DIY fire pit.

We apparently haul gravel instead of tie bows on gift boxes. Because we built our homemade fire pit in a weekend! And actually we had this one knocked out completely in about 9 hours total, but we had to wait for our next day gravel delivery to finish on Day 2.
As Cousin Eddie would say, “It’s the gift that keeps on giving the whoooooole year.” 😉
We busted out our STIHL Yard Boss again like we did on our flower bed makeover from this past summer, and it made the job go way faster.
Honestly, we were SHOCKED that we knocked out this backyard firepit so fast. That never seems to happen with big projects.
The Backyard Conditions Before This Project
If you’ve been around a while, you might remember when our backyard looked like this.

Fence falling in, wooden pergola rotting, bricks scattered around, shrubs taking over… it needed some love.

Robert and a close friend of ours demolished the fence and pergola a couple of years ago, and we called in the pros for the tree/shrub removal and grading/seeding this fall to make it a wide open space our family can enjoy.

The grass is still working its way in, so it’s not cute back here yet. But come spring, this outdoor space is going to look brand new and green!

The DIY Fire Pit After
And now it looks like this with the awesome new DIY fire pit! I’ll dive into all of the nitty gritty steps so you can make one in your own backyard.
Here’s how we knocked out the backyard firepit so quickly.
Backyard DIY Fire Pit Tutorial
Supplies
- Tape measure
- Spray paint
- Flag markers
- Heavy duty landscape fabric
- Landscape fabric staples
- Mallet
- Scissors and/or utility knife
- Wooden stake
- String
- Heavy duty construction adhesive
- Caulk gun (for applying adhesive)
- Fire pit stone kit (We used a Tremron Munich stone kit in the color Sand)
- Edging stone (We used Tremron Munich Sand wedge blocks)
- Pea gravel (We used Colonial Grits pea gravel)
Tools
- STIHL Yard Boss
- STIHL Yard Boss Edger Attachment
- STIHL Bolo Tines Cultivator Attachment
- Large shovel
- Wheelbarrow
- Rake
The Steps
Step 1 – Plan and Mark the Fire Pit Perimeter
First, we planned out our space using flag markers to visualize our pathway and circular fire pit area. During our planning, we kept our edging stone length in mind (6 inches), so that each walkway edge wouldn’t require any stone cuts.
Step 2 – Dry Fit the Fire Pit Kit Stone
At this point, we dry-fitted our stone fire pit kit (no adhesive) so that we knew for sure the area around it was large enough for chairs and foot traffic.

Step 3 – Mark the Seating Area Surrounding the Fire Pit
To plan our circular fire pit area, we drove a wooden stake into the ground, tied a string to the end, and used it as a center point to form a perfect circle as we marked with flags.
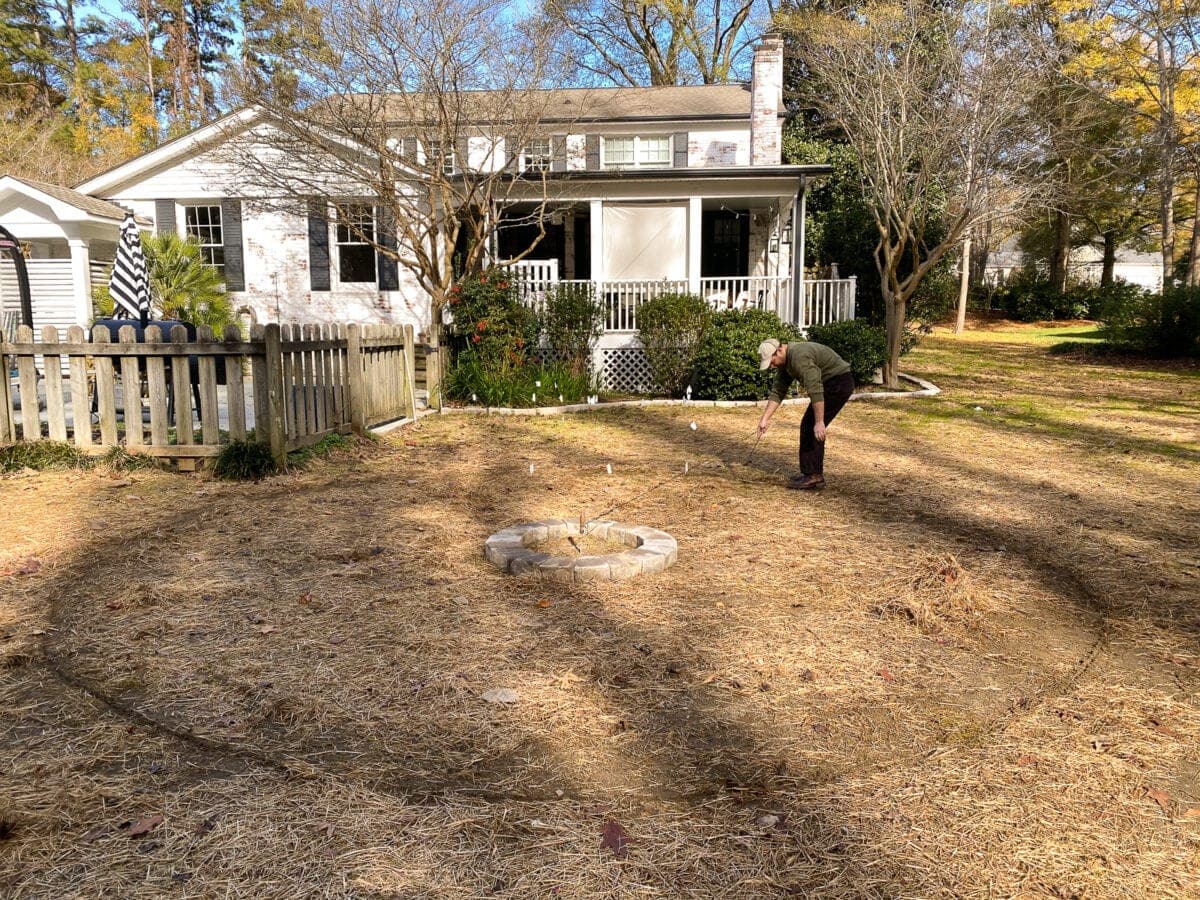
Step 4 – Spray Paint the Outline
Once we were happy with our fire pit layout, we spray painted the lines and removed the flag markers.

Step 5 – Edge the Painted Lines
To create an edge, Robert walked along with spray painted lines with the STIHL Yard Boss equipped with the Edger Attachment.


Step 6 – Remove Grass with Cultivator
Then to remove any grass, go over the area with the STIHL Yard Boss equipped with Bolo Tines Cultivator Attachment.
Brush the removed layer of grass out of the way to start with a smooth, dirt surface. Users should always wear all proper protective equipment and review the instruction manual before operation

Step 7 – Roll Out Landscape Fabric and Secure
We then rolled out landscape fabric cut to the size and shape we needed and secured it to the dirt surface with landscape staples using a mallet.
Leave a hole in the fabric in the middle for the actual fire pit. (Since we already had an old canvas painting tarp, we used that underneath the landscape fabric too as an extra weed barrier.)

Step 8 – Place Edging Stones Around Seating Area
Next, we placed the edging stone all around the sides of the landscape fabric. Once happy with the layout, you can attach the stones to each other (including the fire pit kit) using heavy duty construction adhesive.

Step 9 – Place Pea Gravel
Finally, we hauled the pea gravel with a wheelbarrow to pour over the landscape fabric surface and raked it smooth.

Step 10 – Light a Fire and Enjoy Your Backyard Firepit!
And maybe decorate a little bit of course. 😉


Backyard Fire Pit Decor
We added black Adirondack chairs for comfy lounging and lit that newly built bad boy up! I turned over a wooden barrel planter as a little table for accessing s’mores supplies too. 😉


These little Christmas trees were a lucky backwoods tree farm find that we scored for $18 each! I put them in wooden barrel planters too and I’m thinking some long-term shrubs will look really cute in them once the trees meet their ultimate demise.


UPDATE: 1 Year Later!
It’s been a year and a half since we finished this backyard fire pit, and we are so incredibly happy with this space! Not a single weed has grown through the pea gravel, and it is our absolute favorite place to gather with family, friends, and neighbors!

Y’all have no idea how thankful we are to have a backyard finally starting to take shape. We have mighty big plans for the rest of this backyard in 2021 (crossing fingers for a work shed, play area for the girls, and a new fence).
UPDATE: See our full backyard transformation and cost breakdown here!

It’s been quite a journey, and the adventure’s over yet.
A backyard firepit really was the best Christmas gift ever for our family that we’re so excited to enjoy all year-round.


Home wasn’t built in a day. And this backyard is a witness to that.
More DIY Backyard Project Ideas
- DIY Flower Bed Makeover
- DIY Outdoor Movie Theater
- Our Painted Concrete Patio & Pool Deck Update
- Stencil Painted Porch Floor
- How to Paint Vinyl Siding & Pool Shed Makeover
- Our Back Porch Makeover
- Limewashed Brick Exterior Makeover

If you want to save this post for later, you can pin it here:

Related Posts
- 15 Gorgeous Fire Pit Decorating Ideas
- DIY Lime Washed Brick Fireplace
- DIY Hidden Backyard Beer Garden
- DIY Backyard Pergola Cabana
- Our Favorite Yard Games and Outdoor Toys