DIY Large Scale Wall Art from a Shower Curtain
How to make your own large wall art using a shower curtain for less than $100 plus a round-up of gorgeous art design shower curtains for the job.
This project officially climbed to the top of the list of our favorite art DIY ever! And that’s saying something. Because we’ve done a lot. Like… a LOT of art projects.
We’ll print high resolution images from our home printer and stick them in a frame or run to Staples for a cheap engineer print any time. But those freebie/cheapo art solutions only go so far and the max size we can usually print is 24″x36″.
This time, we made a honkin’ 5’x4′ stretched canvas for less than $60! (Thanks to finding a shower curtain on sale for $40.) I swear if we bought this thing from an actual retailer, it’d be several hundred to $1,000-ish.
Total props to House of Jade Interiors and Angela Rose Home because we thought we came up with this totally brilliant idea until we discovered they are the O.G.s of this concept.
Here’s how we made it…
DIY Large Scale Wall Art from a Shower Curtain
(Some affiliate links are provided below. Full disclosure here.)
Supplies Used:
- 5 1″x2″x8′ boards
- 4 lattice strips
- Shower curtain with design of your choice (We chose this pretty abstract landscape one and I’ve rounded up a bunch of my favorite shower curtains to make into art at the end of this post.)
- Power drill & bits
- Hand saw or miter saw (You could definitely do this project with very basic tools.)
- Staple gun
- Hammer or brad nail gun
- Brad nails
- 6 wood screws
- Staples
- Wood stain (I used the color Minwax Special Walnut.)
The Steps:
1. Stain the lattice strips and allow to dry while you work on the next steps.

2. Decide the dimensions you want for your art first by measuring your shower curtain and allowing for 3-4 inches of excess for overhang. We decided to make ours 5’8″ x 4′.

3. Measure, mark, and cut your 1″x2″ boards to make the canvas frame (4 boards around the perimeter and 1 or 2 boards in the middle for support).
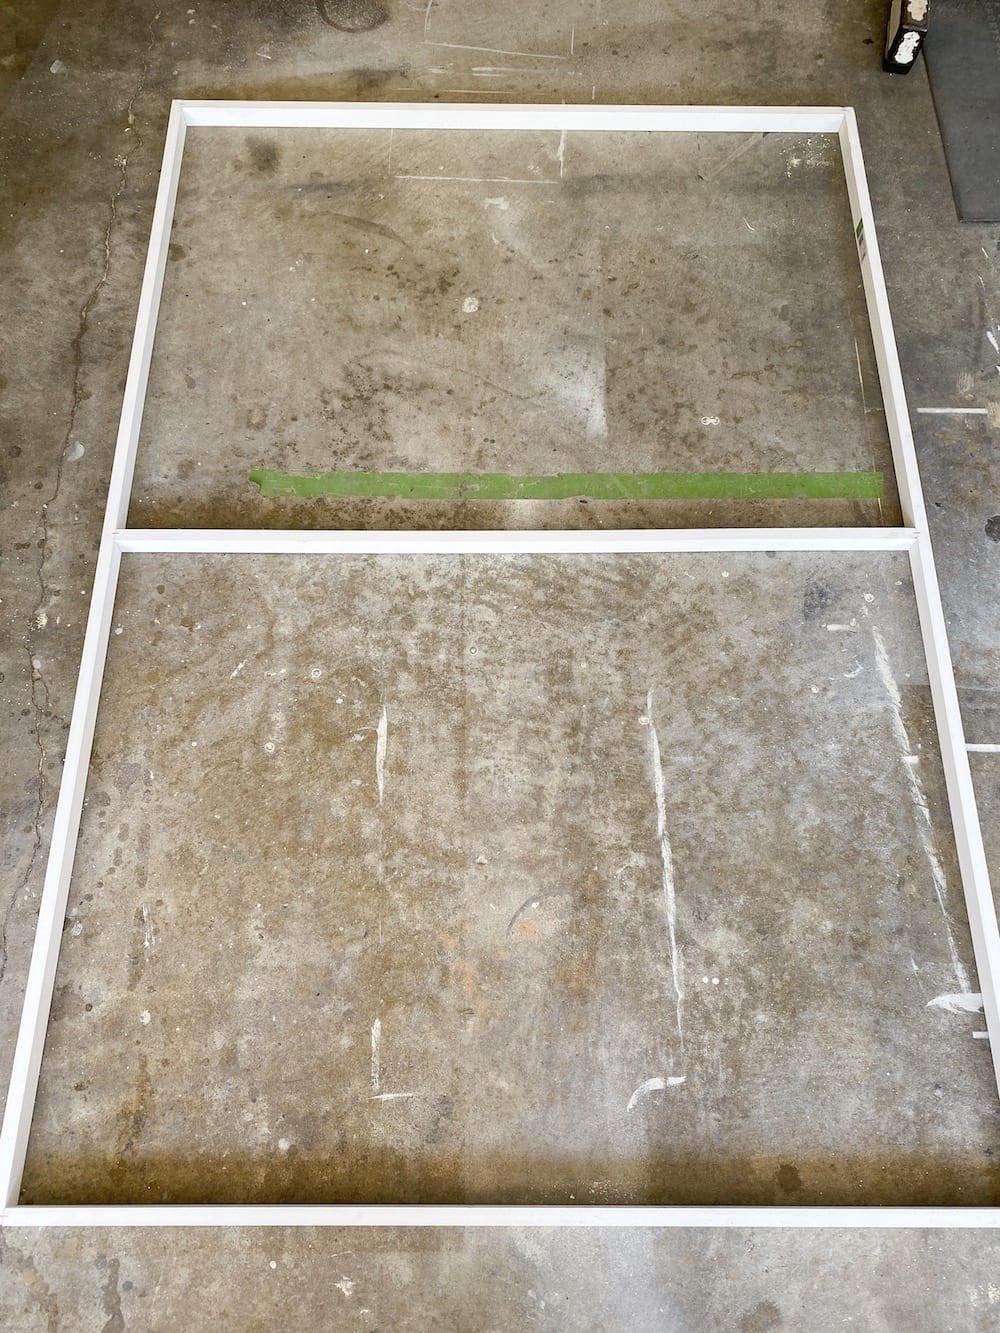
4. Use a drill to make a pilot hole at the corners where the boards meet and drive in wood screws to attach the boards. Staple the boards at the seams too.


5. Lay your shower curtain on top of the canvas frame and align it as desired. Place a couple of staples at the top of the shower curtain to secure it to the canvas frame.

6. Flip the canvas frame over so that the shower curtain is facing down with the frame on top of it.

7. Begin wrapping the top edge of the shower curtain, smoothing the fabric along the board, and staple it along the entire edge.
8. Repeat on the bottom edge of the shower curtain, this time stretching the fabric to eliminate any wrinkles.
9. Stretch and staple the fabric at both side edges.
10. Fold and staple each of the four corners.


11. Staple any excess fabric to the boards as well.
12. Measure and cut 2 lattice strips to fit the top and bottom of the canvas. Use brad nails to attach the strips to the canvas frame.

13. Repeat for the side lattice strips, making sure to account the side lattice measurements for the top and bottom lattice strips you previously added.
14. Anchor a couple of screws to the wall where you want to place the canvas, hang, and you’re done!

This whole project took less than 2 hours to do and it has made such a huge impact in our office makeover already!
Robert says he wants to make another one with a giant world map for our garage since he technically considers the garage his office. Poor guy needs a man cave. Haha!

What do you think?!
Here are a few more shower curtain designs from some of my favorite artists that I think would make gorgeous art! I had a hard time choosing just one for ours.

If you want more DIY art ideas, you can see a bunch more here.